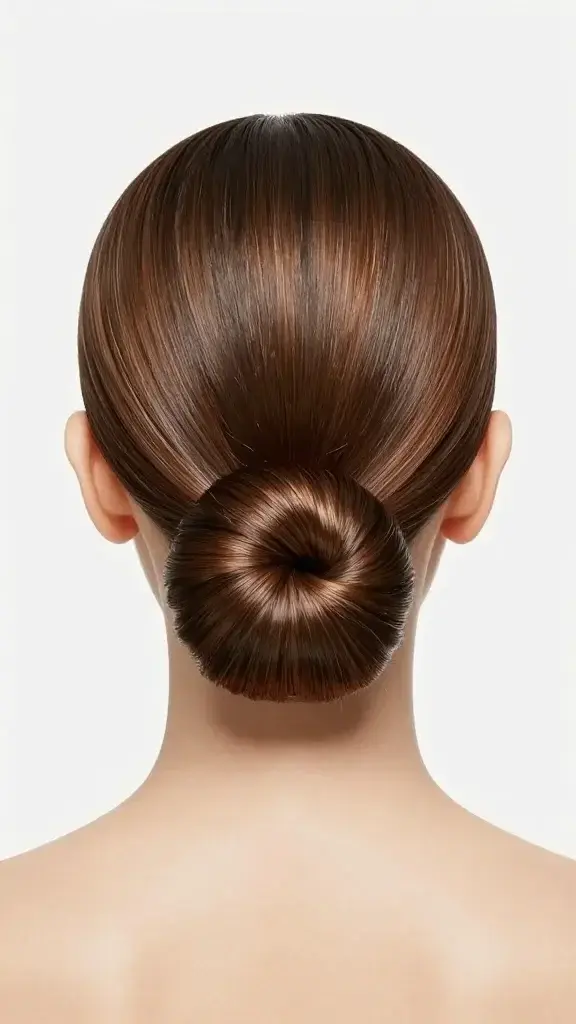
Your 5-Step Guide to How to Achieve the “I Woke Up Like This” Polished Bun.
You know that bun that looks effortless, like you rolled out of bed perfectly sleek and smug? Yeah, that one. The “I woke up like this” polished bun isn’t witchcraft—it’s technique, a few right products, and a little attitude. You don’t need 45 minutes or a glam squad. You need five-ish steps, a brush, and some confidence. Let’s make it happen.
Know Your Bun Mood: Slick, Soft, or Somewhere In-Between
You have options, and yes, your hair texture and length matter. Decide the vibe before you start because product and placement change the whole look. Want boardroom boss? Go low and snatched. Coffee run cute? Mid-height and softly tucked.
- Ultra-sleek: Center part, low bun, high shine.
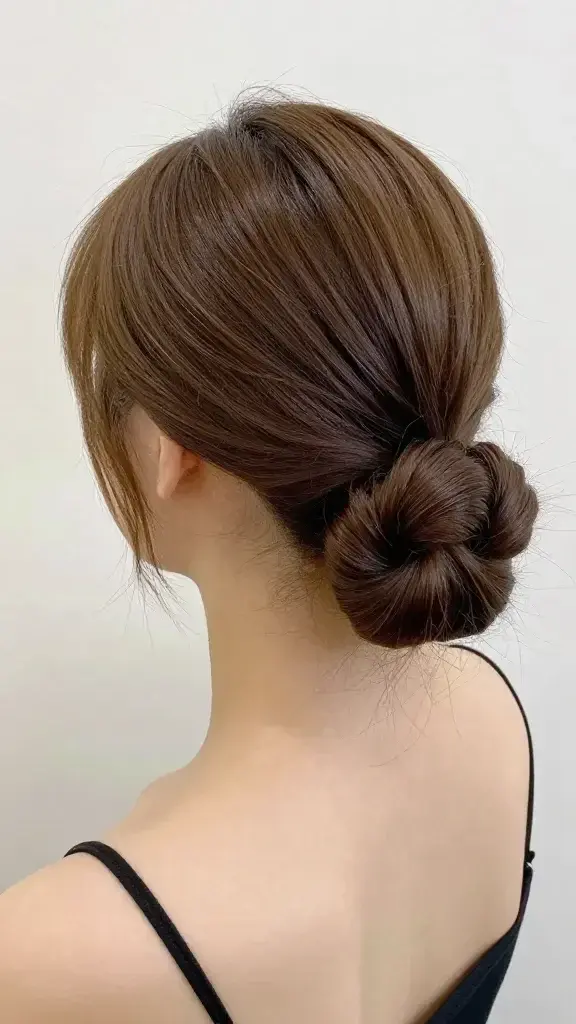
- Polished but soft: Gentle side part, mid bun, slight puff at the crown.
- Curly/coily glam: Defined front, coiled bun, laid edges if you like.
Pro tip: Day-two hair works best. Freshly washed hair can be too fluffy and slippery. If you must start fresh, add texture spray or a quick blowout with grip.
Prep: The Secret Sauce You Can’t Skip
Great buns start with prep. You want hold, shine, and just enough texture to sculpt without crispy vibes.
- Brush: Boar bristle or boar-nylon mix for smoothing.
- Hold: Medium-hold gel or styling cream (gel for sleek, cream for soft).
- Shine: Lightweight serum or hair oil—pea-sized, promise.
- Control: Strong-hold hairspray for flyaways at the end.
- Hardware: Snag-free elastic, a few bobby pins, optional hair net (not granny—tiny and invisible).
Texture tweaks by hair type
- Fine/straight: Add dry shampoo or texturizing spray at roots for grip. Avoid heavy oils.
- Thick/wavy: Use styling cream on damp hair, blow-dry smooth or diffuse, then gel for the perimeter.
- Curly/coily: Work with your curl pattern. Apply leave-in and gel on damp hair, brush into place, then band. Edge control if that’s your thing.
Part, Place, and Polish: The Core Steps
Let’s keep it simple. Do this once and your hands will remember forever.
- Part with purpose. Center = sleek and modern. Side = soft and flattering. No part = sporty-chic. Commit.
- Smooth and gather. Apply your gel/cream around the hairline and crown. Brush hair back with firm strokes. Keep the surface glassy.
- Choose bun height. Low at the nape for classic polish. Mid-height for casual clean. High for a lifted look (mini facelift effect, FYI).
- Tie the base. Secure a ponytail tight enough to hold but not headache tight. Elastic goes on cleanly—no hair snags, no lumps.
- Wrap the bun. Twist the pony lightly (do not strangle it), wrap around the base, and pin as you go. Cross your bobby pins for a lock.
Speed hack: For slippery hair, mist the ponytail with hairspray before wrapping. It behaves better, like magic but cheaper.
Two foolproof bun methods
- Rope twist: Split pony in two, twist each section, then twist together the opposite direction and wrap. Gives a sleek rope effect.
- Fold-and-tuck: Fold pony in half, place the loop against the base, and pin ends underneath. Fast, soft, and secure.
Shine, Smooth, and Edge Control (But Keep It Real)
Now we make it look intentional—like you didn’t try, but obviously tried.
- Shine placement: Emulsify a pea-sized drop of serum in your palms. Glide over the surface only. No scalp oil slick, please.
- Flyaway fix: Spray hairspray on a toothbrush or clean spoolie and sweep the baby frizz down. Pocket-friendly tool, IMO.
- Edges (optional): If you like laid edges, swoop gently. Keep it minimal for the “effortless” illusion.
If you need all-day hold
- Use a medium gel under a strong-hold hairspray.
- Pop a fine hair net over the bun that matches your hair color—practically invisible but clutch for long days.
- Finish with a cool shot from your blow dryer to set everything.
Customize for Your Cut and Length
Bun doable on almost everything except a fresh pixie. Here’s how to fake it till you make it.
- Long layers: Use two elastics: one for a tight base, another to secure the wrapped ends. Pin escaping layers under the bun.
- Medium length (collarbone): Go low. Tuck ends under the elastic, then pin. Slightly looser perimeter looks intentional.
- Short or layered bangs: Part and style bangs as face-framing pieces. Curl slightly or smooth flat—both read polished.
- Very long hair: Braid the ponytail loosely, then wrap. It reduces bulk and looks sleek instead of “croissant.”
Make It Last: Gym to Dinner Strategy
We love longevity. You can run errands, take a Zoom, maybe flirt with happy hour—all with one bun.
- Set the base right. A tight, smooth pony is 80% of the job. Lazy pony = unraveling bun.
- Keep a mini kit. Travel hairspray, 3 bobby pins, a spoolie. Tiny bag, major payoff.
- Refresh in 30 seconds. Press flyaways with damp hands, swipe with spoolie + spray, and pinch the bun to re-tighten pins.
- Post-workout: Blast your roots with cool air or dry shampoo, then re-smooth the perimeter with a dab of gel.
Accessories that still feel effortless
- Skinny hair ribbon: Tie around the base for soft polish.
- Minimal claw clip: Clip over a folded bun for a no-pin day.
- Thin gold pins: Slide two parallel pins above the bun—chic without trying too hard, FYI.
Common Mistakes (And Quick Fixes)
We’ve all been there. Here’s how to rescue the moment.
- Helmet hair: You used too much product. Scrunch the surface with dry hands to break the cast, then mist with a light shine spray.
- Frizz halo: You skipped smoothing. Add a dime of cream and brush again with a boar bristle, then set with hairspray.
- Slipping bun: Pins face the wrong way. Insert bobby pins with the wavy side down toward the scalp, then push in and pivot.
- Bun too tight (headache alert): Re-do the pony one notch looser and distribute tension by brushing back in sections.
FAQ
Can I do a polished bun on wet hair?
You can, but I don’t recommend soaking wet. Damp works better. It sets smoother and avoids the “crunchy at the scalp, fluffy at the ends” situation. Let hair air-dry to 70% or blow-dry with a paddle brush for control.
What if my hair refuses to look sleek?
Layer your products: cream for control, gel for hold, hairspray to set. Use a boar bristle brush, not a wide-tooth comb. And choose low placement—gravity helps you out, IMO.
How do I avoid flakes from gel and hairspray?
Apply gel to damp hair, not dry. Use less product but work it evenly with a brush. Once it’s set, don’t keep re-brushing dry product—that’s flake city. Instead, re-activate with a mist of water or a little leave-in.
Will a polished bun damage my hair?
Only if you yank it or use tight elastics daily. Rotate bun height, use snag-free ties, and give your scalp a break sometimes. A tiny bit of oil before removal helps the elastic glide off without snapping strands.
What’s the best bun for fine hair that looks skimpy?
Go mid-height and use the fold-and-tuck method or a loose braid wrap to build volume. A lightweight volumizing powder at the pony base also gives you that fuller “oomph” without crunch.
Do I need edge control?
Only if you want that defined look. A small amount can elevate the finish, but keep it soft to maintain the effortless vibe. If your edges curl adorably, embrace them—polished doesn’t mean erased.
Conclusion
The “I woke up like this” polished bun = smart prep, smooth perimeter, secure base, and selective shine. Keep tools simple, products light, and placement intentional. After a couple tries, your hands will do it on autopilot. Five minutes, major payoff—go be smug about it.